Sow and Grow Mesclun – Technique Tips with Photos
The flavors, textures and colors of these baby salads enjoyed just minutes after they are cut is one of the best rewards of kitchen gardening.
Mesclun is a cool season crop. Grow in spring through early summer and plant again in early fall. Start with a well-prepared 2 or 3 foot square seedbed or use a half barrel or a 15 to 18 inch planter filled with good potting soil. Here's how we grow mesclun in our trial garden.
Mesclun is a cool season crop. Grow in spring through early summer and plant again in early fall. Start with a well-prepared 2 or 3 foot square seedbed or use a half barrel or a 15 to 18 inch planter filled with good potting soil. Here's how we grow mesclun in our trial garden.
1) Mesclun requires a fertile, well-worked seed bed. Wait until your soil is moist, but not soggy, then add compost or a well-balanced fertilizer and dig it into your soil. Break up any clumps and rake out the soil so that the surface is level and of an even texture.
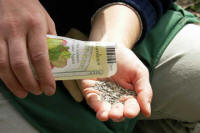
2) Always read your seed packet first for important cultural information such as when to plant, how deep to cover your seed, and much more! To start sowing, pour out some seed into the palm of your hand.
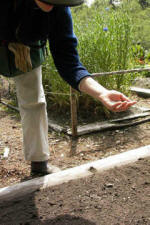
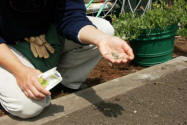
3) Hold your hand over your seed bed and shake it side to side allowing seed to fall onto the bed. Your goal is to distribute the seeds evenly about 1/2 inch apart. Make adjustments in seed spacing by moving your hand closer or farther from the soil. You can practice this over a sheet of newspaper until you get the hang of it.
4) We save our used potting mix, provided there were no diseases present, to cover our seeds, but you can also use fine garden soil. Cover seed no more than 1/4 inch deep. Sprinkle the soil uniformly over the seeds, or shake carefully from a container such as this 4 inch pot.
5) Gently water your covered seeds. Use a watering can or hose with an attachment that diffuses the water so that it sprinkles like a gentle rain – this will prevent the water from washing away the soil. Until your seeds germinate (sprout), you need to keep the soil constantly moist, but not soggy. Proper watering is crucial for success.
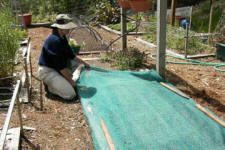 6) Covering seed beds with shade cloth or row covers greatly reduces the frequency of watering needed to keep the bed moist. Be sure to check daily to see if your seeds have germinated, and then immediately remove the covering so the seedlings get proper light and air circulation. After your seeds germinate, help them to grow well by providing even and regular water.
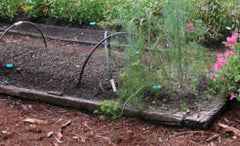
7) Protect seedlings from predators such as birds, snails and slugs. This is an example of our set-up to deter birds (and digging pets). We make our support hoops from flexible, black plastic irrigation tubing, commonly called polytube available at most garden centers. Cut it in lengths appropriate for the width of your garden beds. Push the ends into the soil to form arches. Drape bird netting over the arches and secure all edges. For snails and slugs, we suggest Sluggo, which is non-toxic to humans, pets and wildlife.
8) Well tended mesclun plants grow quickly. When leaves are at least 4 inches tall in about 30 to 40 days you can begin cutting. To harvest, you'll need a basket or bowl and a regular pair of scissors. Gently hold a clump of leaves with one hand while cutting with the other. Leave 1/2 inches of leafy crowns on the plants so they are able to photosynthesize and re-grow for another harvest.
9) With proper care, you can expect to get 2 and sometimes 3 harvests from your mesclun bed. Nitrogen is an important nutrient for lettuce and the other leafy greens in our mesclun mixes. After each cutting, apply a high Nitrogen liquid fertilizer, such as fish emulsion, to encourage new growth. Always follow instructions for diluting fertilizer before using.
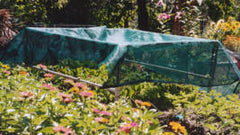
10) Lettuce and many of the other greens in mesclun mixes grow best in cool weather. In areas with hot summers, you can extend your growing season by providing shade. To do this, you can either plant in a location that gets afternoon shade from a tree or structure, or you can use shade cloth. In this photo the mesclun bed is covered with shade cloth draped over a frame made with PVC pipe and fittings.
Click Here to view and purchase our selection of fine Mesclun blends.
1) Mesclun requires a fertile, well-worked seed bed. Wait until your soil is moist, but not soggy, then add compost or a well-balanced fertilizer and dig it into your soil. Break up any clumps and rake out the soil so that the surface is level and of an even texture.
2) Always read your seed packet first for important cultural information such as when to plant, how deep to cover your seed, and much more! To start sowing, pour out some seed into the palm of your hand.
3) Hold your hand over your seed bed and shake it side to side allowing seed to fall onto the bed. Your goal is to distribute the seeds evenly about 1/2 inch apart. Make adjustments in seed spacing by moving your hand closer or farther from the soil. You can practice this over a sheet of newspaper until you get the hang of it.
4) We save our used potting mix, provided there were no diseases present, to cover our seeds, but you can also use fine garden soil. Cover seed no more than 1/4 inch deep. Sprinkle the soil uniformly over the seeds, or shake carefully from a container such as this 4 inch pot.
5) Gently water your covered seeds. Use a watering can or hose with an attachment that diffuses the water so that it sprinkles like a gentle rain – this will prevent the water from washing away the soil. Until your seeds germinate (sprout), you need to keep the soil constantly moist, but not soggy. Proper watering is crucial for success.
 6) Covering seed beds with shade cloth or row covers greatly reduces the frequency of watering needed to keep the bed moist. Be sure to check daily to see if your seeds have germinated, and then immediately remove the covering so the seedlings get proper light and air circulation. After your seeds germinate, help them to grow well by providing even and regular water.
7) Protect seedlings from predators such as birds, snails and slugs. This is an example of our set-up to deter birds (and digging pets). We make our support hoops from flexible, black plastic irrigation tubing, commonly called polytube available at most garden centers. Cut it in lengths appropriate for the width of your garden beds. Push the ends into the soil to form arches. Drape bird netting over the arches and secure all edges. For snails and slugs, we suggest Sluggo, which is non-toxic to humans, pets and wildlife.
8) Well tended mesclun plants grow quickly. When leaves are at least 4 inches tall in about 30 to 40 days you can begin cutting. To harvest, you'll need a basket or bowl and a regular pair of scissors. Gently hold a clump of leaves with one hand while cutting with the other. Leave 1/2 inches of leafy crowns on the plants so they are able to photosynthesize and re-grow for another harvest.
9) With proper care, you can expect to get 2 and sometimes 3 harvests from your mesclun bed. Nitrogen is an important nutrient for lettuce and the other leafy greens in our mesclun mixes. After each cutting, apply a high Nitrogen liquid fertilizer, such as fish emulsion, to encourage new growth. Always follow instructions for diluting fertilizer before using.
10) Lettuce and many of the other greens in mesclun mixes grow best in cool weather. In areas with hot summers, you can extend your growing season by providing shade. To do this, you can either plant in a location that gets afternoon shade from a tree or structure, or you can use shade cloth. In this photo the mesclun bed is covered with shade cloth draped over a frame made with PVC pipe and fittings.
Click Here to view and purchase our selection of fine Mesclun blends.


